


Eclipse IDE Integration
LSP Plugins may be easily developed using Eclipse IDE
Configuring project and build
First of all, you need to install the following plugins:
- Eclipse C/C++ Development Tools (CDT) - for C/C++ development
- Eclipse EGit - for GIT integration
First of all, you need to checkout GIT repository into your workspace by issuing the following command:
cd <workspace-path>
git clone https://github.com/sadko4u/lsp-plugins.git lsp-plugins
cd lsp-plugins
git checkout -b <your-branch> origin/devel
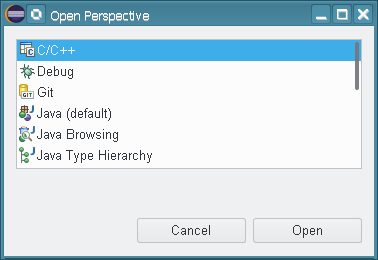
Now we can switch to C++ development perspective by selecting Window → Perspective → Open Perspective → Other...
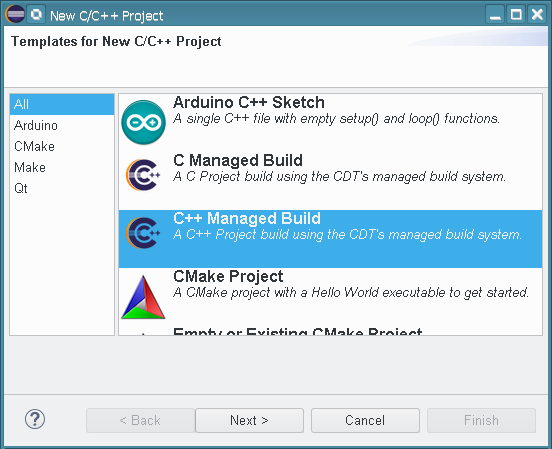
After switching to C/C++ perspective, select File → New → C/C++ Project
In the opened dialog, select C++ Managed Build template, then click Next
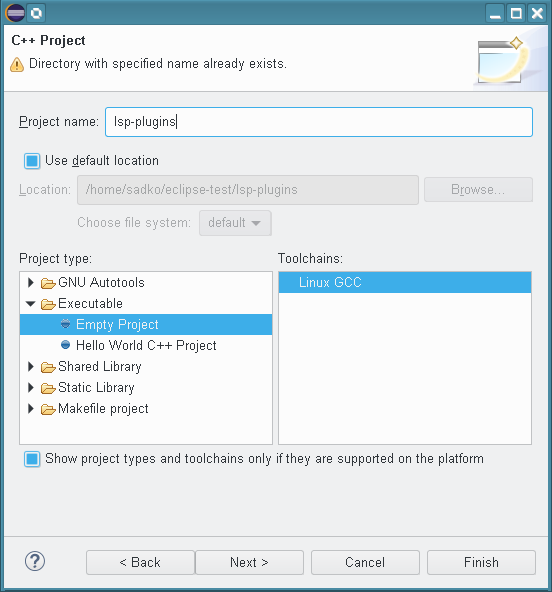
Enter the folder name same to the folder of the GIT repository, select Executable → Empty Project, Linux GCC, then click Finish
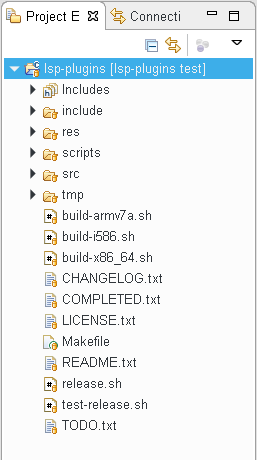
Now, complete project structure is visible in the Project explorer view.
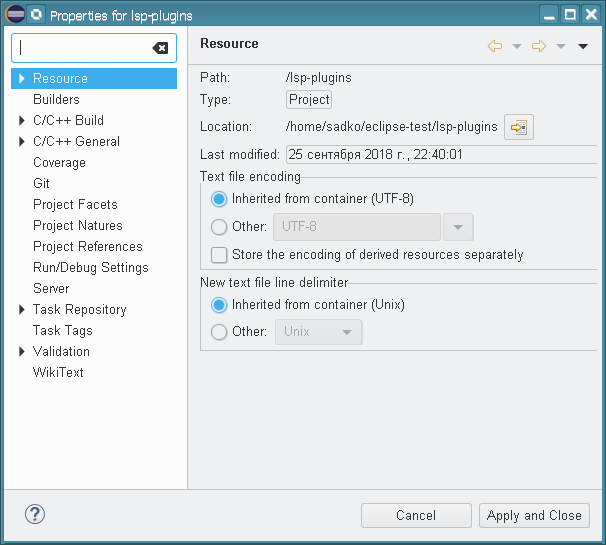
We just need to configure project build. For this case, select Project → Properties menu, the project configuration dialog should appear:
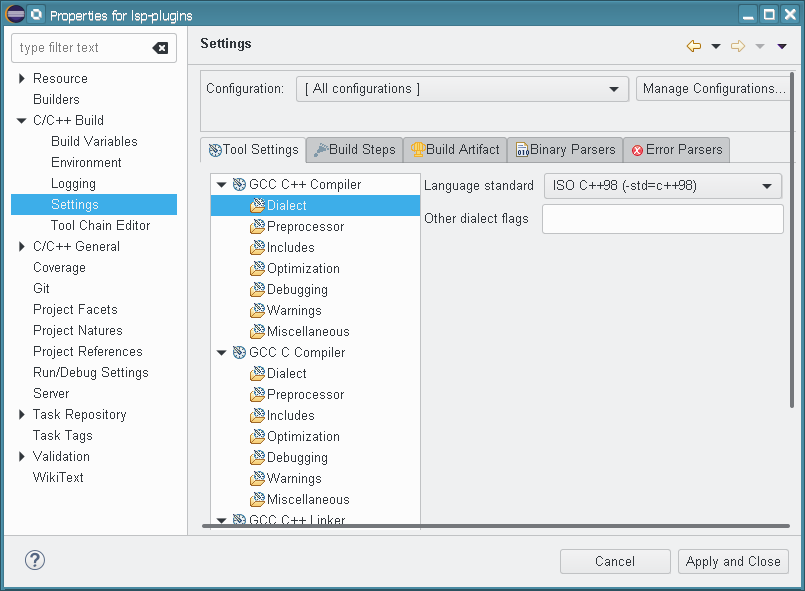
Go to C/C++ Build → Settings and, first of all, select Configuration combo to [ All Configurations ], this will apply all modified settings to all build targets.
Select GCC C++ Compiler → Dialect section and select the ISO C++98 as a Language Standard:
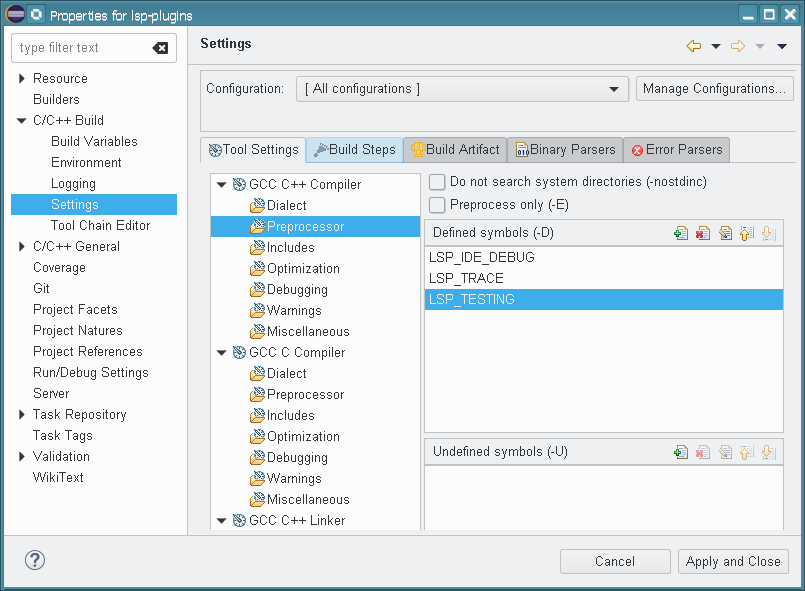
Select GCC C++ Compiler → Preprocessor section and add following macros to Defined Symbols:
- LSP_TRACE - this macro will enable output of trace information to the console while running code in debug environment.
- LSP_IDE_DEBUG - makes invisible set of main() functions that are defined in source code of different tools.
- LSP_TESTING - enables unit testing subsystem in build.
Finally, the window should look like:
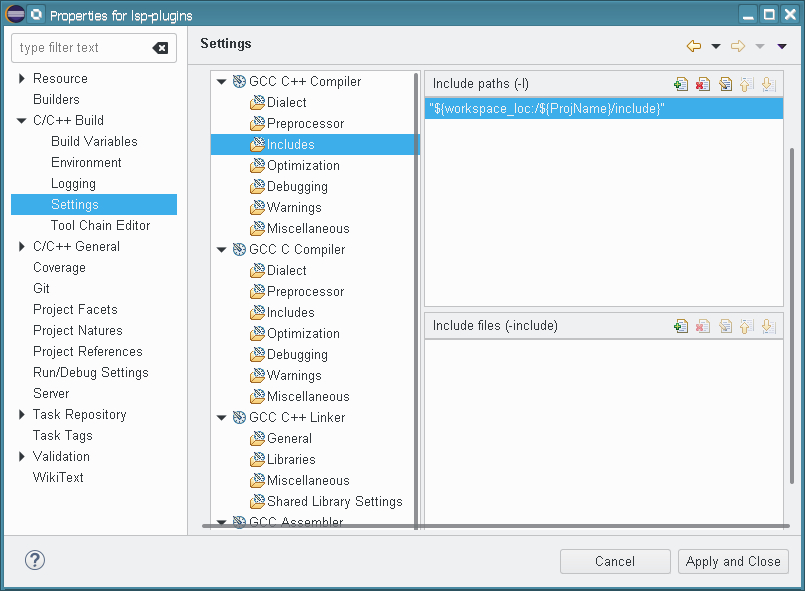
Now we need to define additional location of header files. Select GCC C++ Compiler → Includes and add to the Include paths the following line:
${workspace_loc:/${ProjName}/include}
The window should look like:
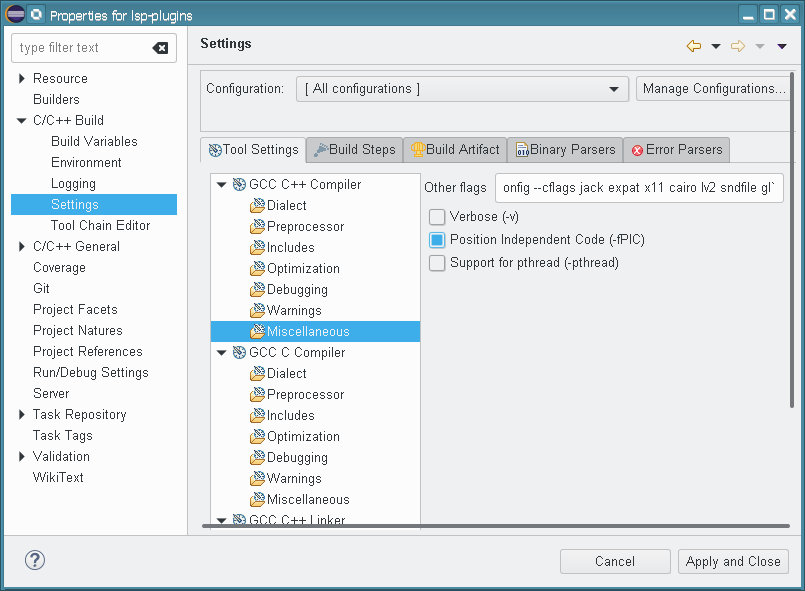
Now we need to enable extra headers for additional packages, for this purpose visit GCC C++ Compiler → Miscellaneous and enter into the Other flags field the following string:
-c -fmessage-length=0 -m64 -msse -msse2 `pkg-config --cflags jack x11 cairo lv2 sndfile gl`
Also, check the Position Independent Code (-fPIC) flag:
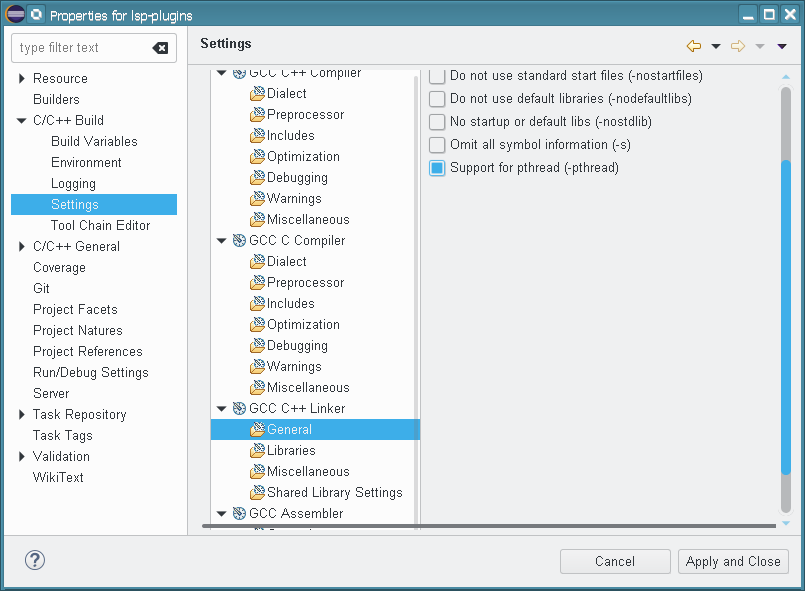
Select GCC C++ Linker → General settings and enable the Support for pthread (-pthread) option:
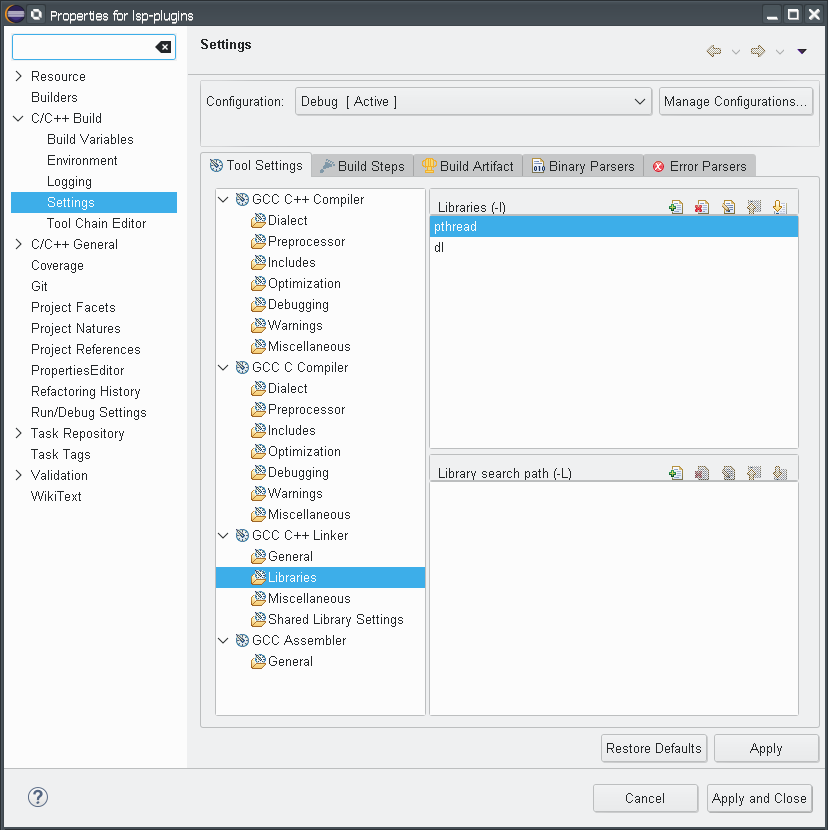
Select GCC C++ Linker → Libraries settings and add the following libraries to the list:
- pthread
- dl
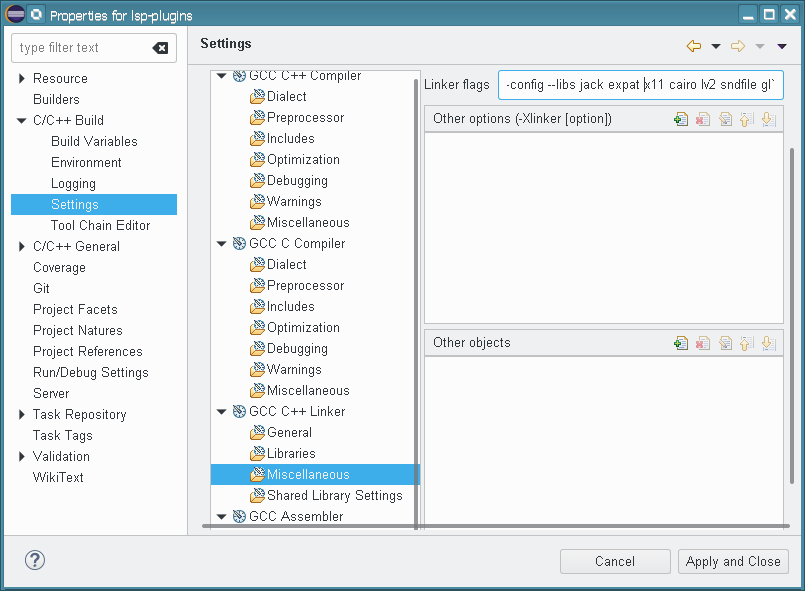
Select GCC C++ Linker → Miscellaneous settings and enter the following string to Linker flags field to enable linkage with external libraries:
`pkg-config --libs jack x11 cairo lv2 sndfile gl`
The window should look like:
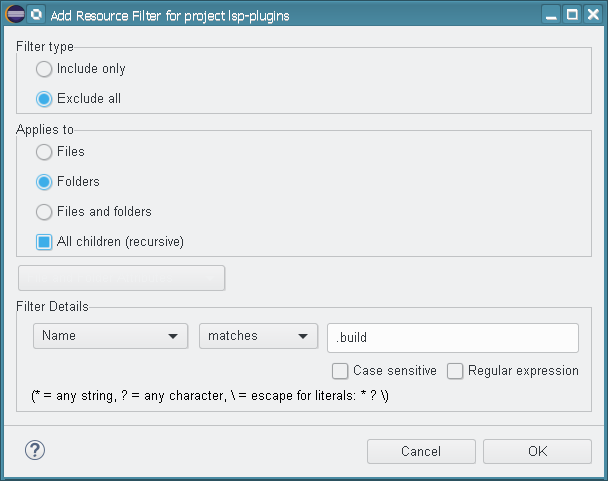
To make resources generated by makefile invisible to IDE, we need to add .build path as excluded from source tree. For this purpose, visit Resource → Resource Filters, click Add Filter
Set Filter type to Exclude all, Applies to - Folders, All children (recursive), Name Matches .build. The result should look like:
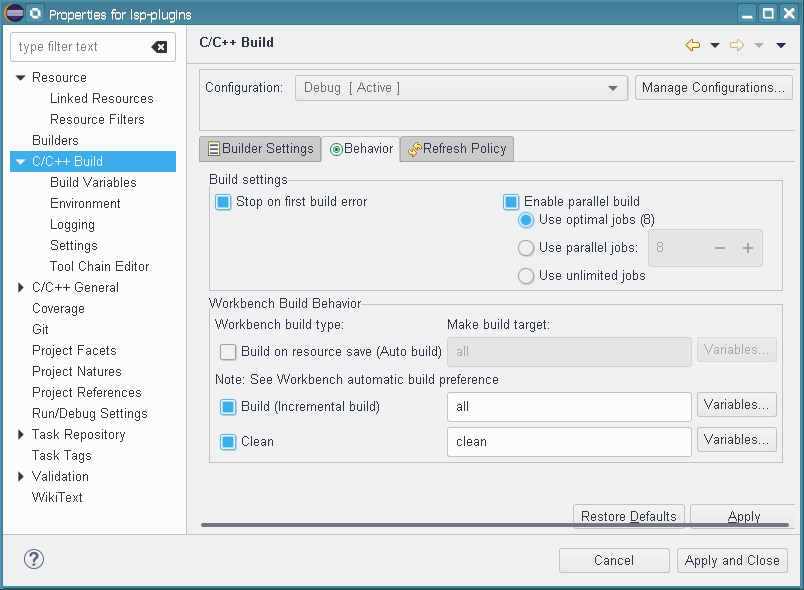
To optimize build, we can enable more than one thread for build. For this purpose, select C/C++ Build → Behavior and click Enable Parallel Build, Use optimal jobs:
Now we can click Apply and Close button and launch build by issuing Project → Build menu item.
Debugging Project
To start debugging, simply issue Run → Debug as → Local C/C++ Application, Eclipse IDE will automatically create configuration for launching build that can be reused in future.
The main() function launches testing subsystem, so in console output we will get the following string:
USAGE: {utest|ptest|mtest} [args...] [test name...]
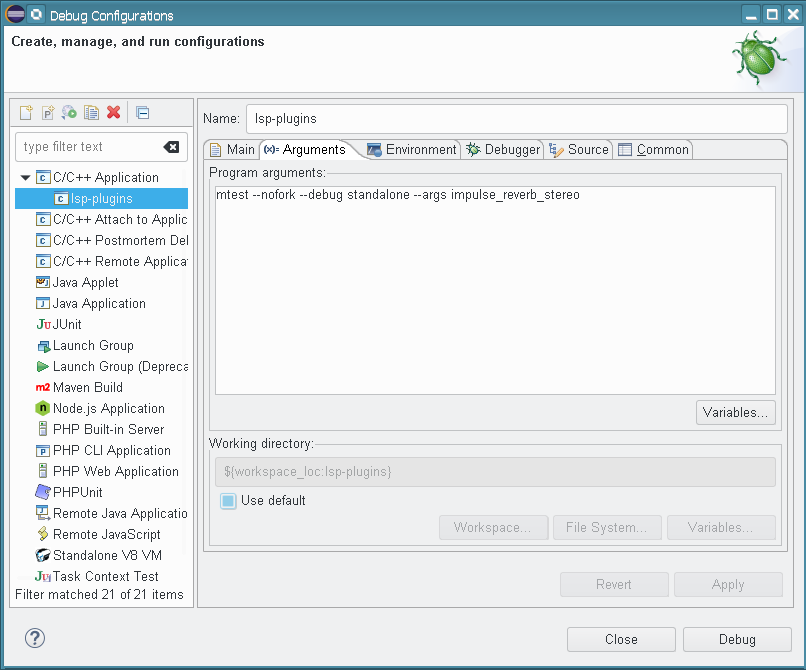
Now we can edit configuration by selecting Run → Debug Configurations... and pass additional parameters to unit testing subsystem. Select the generated lsp-plugins debug profile, Arguments tab and enter testing subsystem command-line arguments. For example, the following:
mtest --nofork --debug standalone --args impulse_reverb_stereo
It will look like:
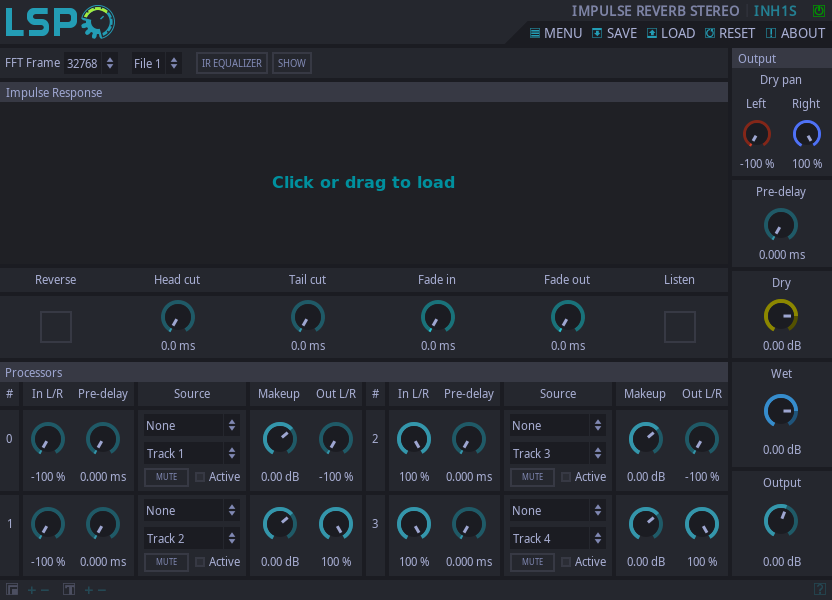
Now click Apply and Debug buttons to start debugging. The example command line will start a standalone Impulse Reverb Stereo plugin that runs under JACK server:
Happy Development!


